7 Phone Photography Mistakes That Make Your Listings Look Amateur
Before you touch an editing app, most of what makes a listing photo look amateur happens in the five seconds before you tap the shutter — the height you're holding the phone at, whether every light in the room is on, and whether the walls are actually straight in frame. These are free, and they're the difference between a photo that needs five minutes of enhancement and one that needs a full reshoot. Here's what real estate photography guides — professional and agent-facing alike — actually recommend, not generic phone-camera tips.
Key takeaways
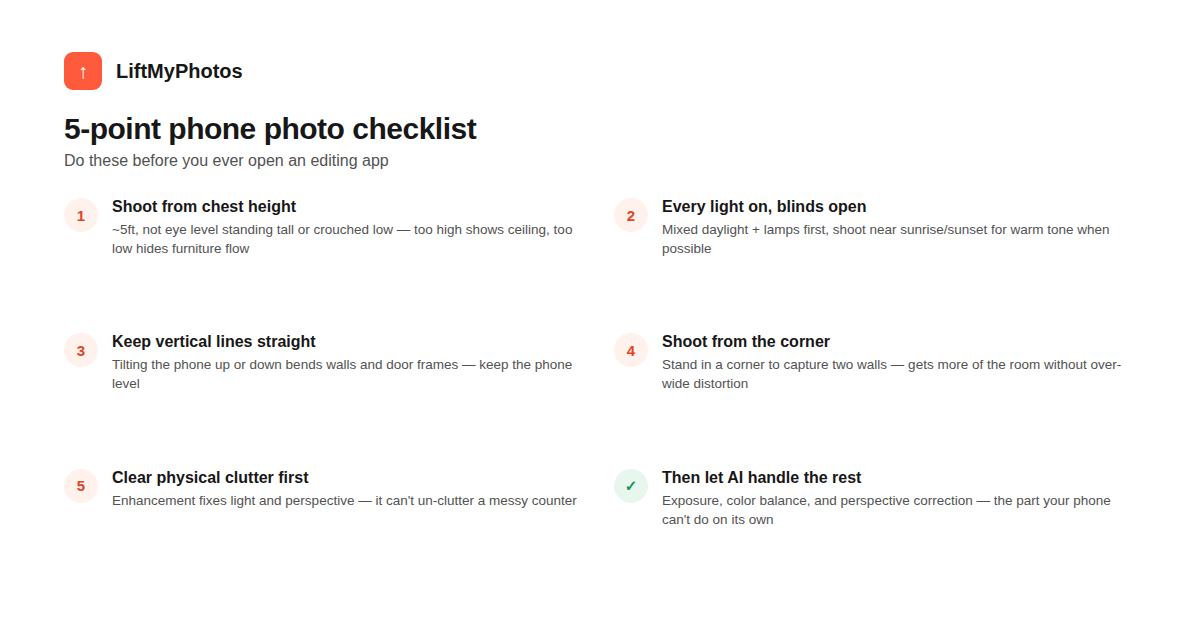
- Shoot from roughly chest height (~5ft) — too high over-captures ceiling, too low hides how furniture sits in the room
- Turn on every light and open every blind before shooting, even in daytime — mixed light sources even out shadows
- Keep the phone level — tilting up or down bends vertical lines like door frames and window edges
- Shoot from a room's corner to capture two walls at once instead of using extreme wide-angle, which can distort scale
- Clear physical clutter before shooting — enhancement fixes light and perspective, not a messy counter
1. Camera height: chest level, not eye level
Holding the phone up at standing eye level is one of the most common mistakes — it tilts the frame downward and captures too much ceiling and too little of the room itself. Professional real estate photography guides consistently recommend shooting from roughly chest height, around 5 feet off the ground. Go lower than that and furniture starts blocking sightlines across the room; go higher and the photo stops reading like a real vantage point a buyer would actually stand at.
2. Every light on, blinds open — even in daylight
A single light source, like only the window or only the ceiling fixture, creates hard shadows that no amount of after-the-fact editing fully undoes without losing detail elsewhere in the frame. The standard advice is to turn on every light in the room and open every blind before shooting, combining natural and artificial light so shadows soften naturally. If you have flexibility on timing, shooting near sunrise or sunset gives a warmer, more flattering tone than harsh midday sun.
3. Keep vertical lines straight
Tilting a phone up or down to fit more of a room into frame bends every vertical line in the shot — door frames lean, windows taper, and walls look like they're falling inward. Keeping the phone level (pointing straight ahead, not angled) keeps those lines straight. This is also one of the specific things perspective-correction in photo enhancement tools exists to fix after the fact, but it's a much cleaner starting point if the lines are close to straight to begin with.
4. Shoot from the corner, not dead center
Standing in a corner of the room and angling to capture two walls at once is a standard composition technique — it captures more of the room's layout than a single straight-on wall shot. The temptation is to reach for an ultra-wide lens or wide-angle phone mode to fit even more in, but going too wide creates visible edge distortion and can make a room look noticeably larger than it actually is — which, beyond looking unnatural, risks misrepresenting the property to a buyer who shows up expecting the room from the photo.
5. Clear physical clutter before you shoot
This is the one step that no editing or AI enhancement tool can fully substitute for. Enhancement fixes exposure, color balance, and perspective — it doesn't move a stack of mail off a counter or tuck cables out of frame. A quick pass to clear visible clutter, straighten cushions, and put away personal items takes a few minutes and has an outsized effect on how put-together the final photo reads, regardless of how it's edited afterward. For exactly what that pass should cover, see our full decluttering checklist.
6. What's left for enhancement to actually fix
Once the shot itself is right — level, well-lit, decluttered — what's usually left is exposure that's slightly off (a bright window blowing out while the room stays dim), color temperature that skews too warm or cool from mixed lighting, and minor perspective correction on lines that aren't perfectly straight even with a level phone. That's the gap tools like LiftMyPhotos are built to close: upload the raw photo and get back a corrected, photorealistic version without manual editing software. Not sure which shots need the most work? Run them through our free photo quality checker first — and if you're on an iPhone, our HEIC to JPG converter handles the format most listing portals can't open directly.

Do I need a tripod for listing photos?
It helps but isn't required. A tripod mainly prevents motion blur from handheld shake, especially in lower light. If you're shooting handheld, brace your arms against your body and avoid shooting immediately after moving.
Should I use my phone's built-in wide-angle lens?
In moderation. A mild wide-angle helps fit more of a room in frame, but going too wide distorts edges and can make rooms look artificially larger than they are — which can mislead buyers and create problems if the property doesn't match expectations at a viewing.
What's the single biggest mistake agents make with phone photos?
Shooting with only one light source active — usually just the window — which creates uneven exposure between bright and dark areas of the same room. Turning on every light before shooting is the simplest fix.
Get the shot right at the phone-camera stage, then let enhancement handle the rest — try LiftMyPhotos free, no credit card required. Wondering if a professional shoot would still be worth it instead? See our full cost comparison.
Related reading


Try LiftMyPhotos on your next listing
3 free enhancements on signup. No credit card required.